

If you’ve ever dealt with a sudden green spot on a nail, a sore cuticle, or an unexplained infection, dirty nail tools might be the silent culprit. In my 10 years as a professional nail technician, I’ve seen countless clients who were meticulous about polish but overlooked tool sanitation.
Sanitizing your nail tools at home isn’t just about cleanliness; it’s about protecting your nail health, skin, and overall well-being. The good news? You don’t need salon-grade equipment to do it right just the correct method.
What Happens When You Don’t Sanitize Nail Tools Properly
Unsanitized tools can harbor bacteria, fungus, and even blood-borne pathogens. Every tiny nick in the skin creates an entry point for infection.
I’ve personally treated clients who reused cuticle nippers without cleaning them, only to end up with painful paronychia (nail fold infection). Prevention is far easier and cheaper than treatment.
Nail Tools That Must Be Sanitized Regularly
Not all nail tools carry the same risk. Some require extra attention.
High-Risk Nail Tools
These tools come into direct contact with skin or nail beds:
- Cuticle nippers
- Cuticle pushers (metal)
- Nail clippers
- E-files and drill bits
- Tweezers
Lower-Risk but Still Important
- Nail files (reusable only)
- Buffers
- Nail scissors
Pro insight: Porous tools like emery boards should never be shared and should be replaced frequently even if they “look clean.”
Clean vs Disinfect vs Sanitize: Know the Difference
One of the biggest misconceptions I see is people thinking soap and water are enough.
- Cleaning removes visible debris (dust, skin, oil).
- Disinfecting kills most bacteria and fungi.
- Sanitizing reduces pathogens to safe levels when full sterilization isn’t possible at home.
At home, your goal is clean + disinfect. That’s the professional standard outside of medical-grade autoclaves.
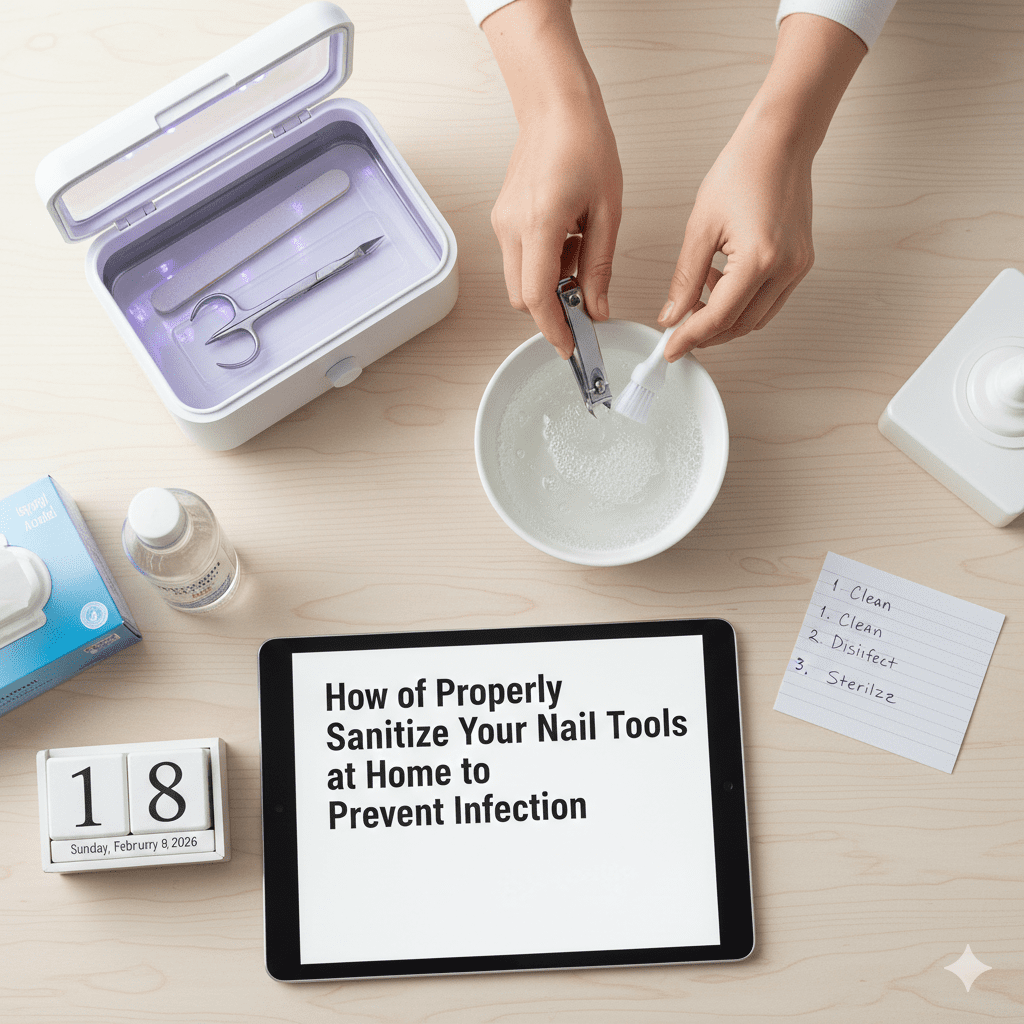
Step-by-Step: How to Sanitize Nail Tools at Home (Professional Method)
Step 1: Pre-Clean Immediately After Use
Never let product or skin dry on tools it becomes harder to remove and traps bacteria.
- Wash tools with warm water and antibacterial soap
- Use a soft nail brush to scrub crevices
- Rinse thoroughly
Dry tools completely before moving to the next step.
Step 2: Disinfect Using the Right Solution
This is where many DIY routines go wrong.
Best At-Home Disinfectants
- 70–90% Isopropyl Alcohol (minimum 70%)
- Barbicide (mixed exactly as instructed)
- Hydrogen Peroxide (3%) for metal tools only
How to use:
- Fully submerge metal tools
- Soak for 10 minutes (no longer over-soaking can cause rust)
- Remove and air-dry on a clean paper towel
Step 3: Dry and Store Correctly
Moisture encourages bacterial growth even after disinfecting.
- Never store tools while damp
- Use a clean, sealed container or pouch
- Keep tools away from bathrooms where humidity is high
Pro habit: I label one container “clean” and one “used” to avoid accidental cross-contamination.
How to Sanitize Nail Files and Buffers Safely
Reusable files are tricky because they’re partially porous.
What You Can Do
- Spray with 70% alcohol until fully wet
- Let air-dry completely
- Use only on yourself, never others
What You Shouldn’t Do
- Soak in liquid disinfectant
- Reuse after visible wear or peeling grit
If a file starts to smell or discolor throw it out. That’s bacteria you can’t see.
Pro Tip: The “Double-Clean” Method I Use at Home
When I do my own nails, I use what I call the double-clean method.
- Clean and disinfect tools after use
- Disinfect again before the next use
This ensures nothing picked up during storage sneaks back onto your nails. It’s overkill for some but perfect if you’re prone to infections or do frequent manicures.
Common Mistakes to Avoid When Sanitizing Nail Tools
Even well-meaning routines can backfire.
- Using boiling water (can dull tools and spread bacteria)
- Mixing disinfectants together (dangerous chemical reactions)
- Using alcohol wipes instead of full soaking
- Sharing tools between family members
- Assuming UV light boxes sanitize tools (they don’t)
Real talk: UV sterilizers are designed for phone screens not nail pathogens.
How Often Should You Sanitize Nail Tools?
This depends on usage, but here’s a professional guideline:
- After every use: Cuticle tools, clippers, drill bits
- Weekly: Stored tools not used often
- Monthly: Deep inspection for rust or damage
If a tool touches broken skin sanitize immediately, no exceptions.
Signs Your Nail Tools Are No Longer Safe to Use
Sometimes the safest move is replacement.
Watch for:
- Rust or pitting on metal
- Loose hinges on nippers
- Persistent odor after cleaning
- Dull edges causing tearing
A damaged tool creates micro-tears in the skin prime entry points for infection.
Why Home Nail Hygiene Is Part of Self-Care
Healthy nails aren’t just about aesthetics they’re about comfort, confidence, and avoiding painful setbacks. I’ve watched clients rebuild nail health after months of damage that could’ve been avoided with proper sanitation.
When you sanitize nail tools at home correctly, you’re protecting the investment you make in your nails every single time you sit down for a manicure.
Final Thought
You don’t need a salon license to maintain salon-level hygiene just the right knowledge and habits. Clean tools mean stronger nails, healthier cuticles, and zero stress every time you do your nails.
What’s one nail tool you’re going to sanitize properly today?