
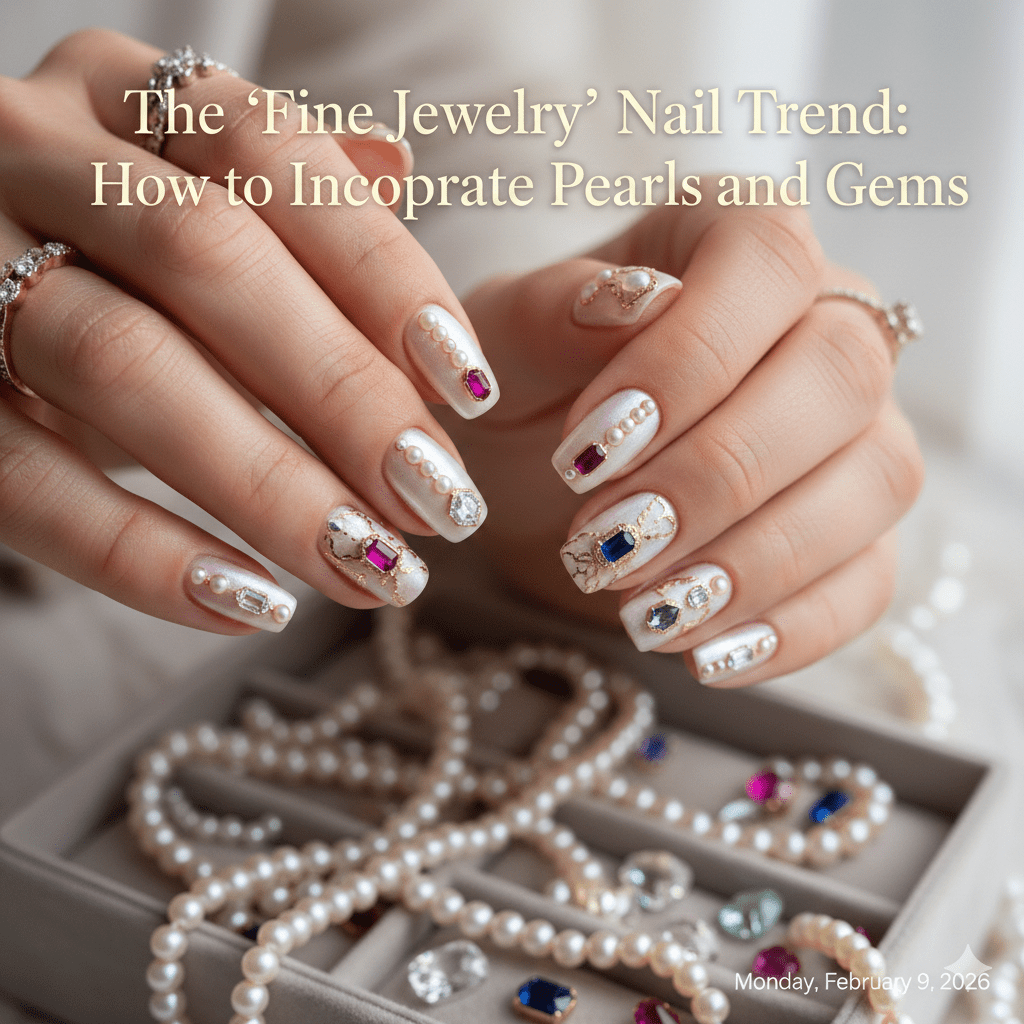

If you’ve ever tried pearl or gem nails at home and thought, “Why does this look costume-y instead of chic?” — you’re not alone.
In my 10 years as a professional Nail Technician and Senior Beauty Editor, I’ve seen many clients love the idea of jeweled nails but hate the final result.
The issue isn’t the pearls or gems themselves. It’s placement, scale, and balance — the same rules that apply to fine jewelry also apply to nails.
What the “Fine Jewelry” Nail Trend Really Means
This trend isn’t about covering every nail in crystals.
It’s about intentional design that mimics real jewelry — think heirloom pearls, delicate rings, and subtle sparkle.
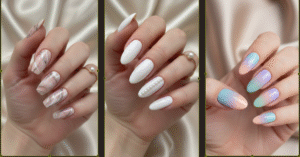
Key Characteristics of Fine Jewelry Nails
- Minimal placement
- High-shine, clean base colors
- Small-scale embellishments
- Negative space for contrast
When done right, the nails look elegant, not heavy.
Why Pearls and Gems Are Trending Again
Fashion cycles influence nail trends more than most people realize.
We’re seeing:
- Pearl handbags and shoes
- Vintage-inspired gold jewelry
- Quiet luxury aesthetics
Naturally, nails are following suit — but in a more refined, wearable way.
Choosing the Right Pearls and Gems (This Matters More Than Color)
Nail Pearls: What Pros Look For
Not all pearls are nail-safe or visually flattering.
Choose pearls that are:
- Flat-backed (never fully round)
- 1–3mm for short to medium nails
- Soft white, ivory, or blush-toned
Avoid oversized pearls unless you’re doing editorial or event nails.
Gems That Look Expensive on Nails
The most “fine jewelry” gems are actually the simplest:
- Clear crystals
- Champagne tones
- Soft gold or silver studs
Colorful rhinestones tend to cheapen the look unless used sparingly.
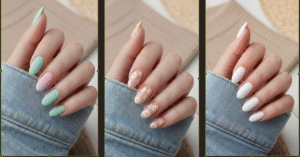
Base Colors That Make Pearls and Gems Look Luxurious
Your base color sets the entire tone.
Best Nail Colors for the Fine Jewelry Look
- Sheer milky pinks
- Soft beige nudes
- Creamy ivory
- Pale gray or taupe
These shades mimic the backdrop of real jewelry displays.
Colors to Be Careful With
- Neon shades
- Chunky glitter bases
- Very dark colors (unless gems are ultra-minimal)
The quieter the base, the more elevated the embellishment looks.
Step-by-Step: How to Apply Pearls and Gems Like a Pro
Step 1: Finish the Manicure First
Never rush into embellishments.
- Shape nails
- Prep cuticles
- Apply base color and cure/dry fully
Jewelry goes on last, just like accessories.
Step 2: Decide Placement Before Glue Touches the Nail
This is where most DIY attempts fail.
Professional placement rules:
- One focal point per nail
- Keep gems near the cuticle or sidewall
- Leave breathing room around each piece
If you wouldn’t wear five rings on one finger, don’t do it on one nail.
Step 3: Use the Right Adhesive (Not All Glue Is Equal)
Skip random craft glue.
Best options:
- Thick gel top coat
- Nail gem gel
- Builder gel for larger pearls
Cure fully before sealing.
Step 4: Seal Without Dulling the Shine
Never coat pearls or gems completely.
Instead:
- Seal around the base
- Use a thin liner brush
- Leave the surface exposed
This keeps pearls glossy and gems sparkly.
Pro Tips I Use on Editorial and Bridal Clients
Pro Tip #1: Mix Textures, Not Sizes
Use pearls and micro-studs together instead of mixing large and small pearls.
This creates dimension without chaos.
Pro Tip #2: Odd Numbers Look More Natural
Three pearls often look better than two or four.
This mirrors how jewelry is styled in real life.
Pro Tip #3: Accent Nails Beat Full Sets
For everyday wear:
- 1–2 embellished nails
- Rest kept clean and glossy
This makes the design feel intentional, not overwhelming.
Common Mistakes to Avoid With Pearl and Gem Nails
Avoid these and your nails will instantly look more refined:
- Overloading every nail
- Using oversized pearls on short nails
- Applying gems before polish is fully set
- Sealing pearls with thick top coat
- Ignoring hand shape and nail length
Fine jewelry nails are about restraint.
Matching Embellishments to Nail Length and Shape
Short Nails
Best choices:
- Single pearl near cuticle
- Tiny crystal accents
- Minimal negative space
Short nails look chic with less, not more.
Medium to Long Nails
You have more freedom, but structure matters.
- Vertical placement elongates
- Centered designs feel balanced
- Avoid horizontal rows that widen the nail
Making Fine Jewelry Nails Last Without Losing Stones
Longevity is a real concern — especially for pearls.
To keep embellishments secure:
- Avoid hot water for first 24 hours
- Wear gloves when cleaning
- Don’t use nails as tools
Reapply top coat around stones after 3–4 days if needed.
Fine Jewelry Nails for Everyday vs Special Occasions
Everyday Wear
- Clear or milky base
- One pearl or crystal per nail (or fewer)
- Soft shapes and neutral tones
Events and Weddings
- Layered accents
- Gold detailing
- Pearl clusters with symmetry
The key difference is density, not quality.
How I Explain This Trend to Clients
I often tell clients this:
“Your nails should look like they’re wearing jewelry — not like they are the jewelry box.”
Once they understand that, design decisions become much easier.
Final Thought From a Nail Professional
The fine jewelry nail trend isn’t about copying Instagram designs.
It’s about translating the principles of real jewelry — balance, scale, and intention — onto your nails.
When pearls and gems are placed thoughtfully, they elevate your manicure instead of overpowering it.
💬 Do you prefer subtle accents or statement nails when it comes to pearls and gems — and what’s stopped you from trying them before?