

If you’ve ever finished painting your nails at home only to think, “Why doesn’t this look like the salon?” — you’re not alone.
After 10 years behind the manicure table, I’ve seen countless clients struggle to recreate professional results without spending money.
The truth is, a salon-quality manicure at home isn’t about fancy tools or expensive polish. It’s about technique, prep, and knowing where not to waste money.
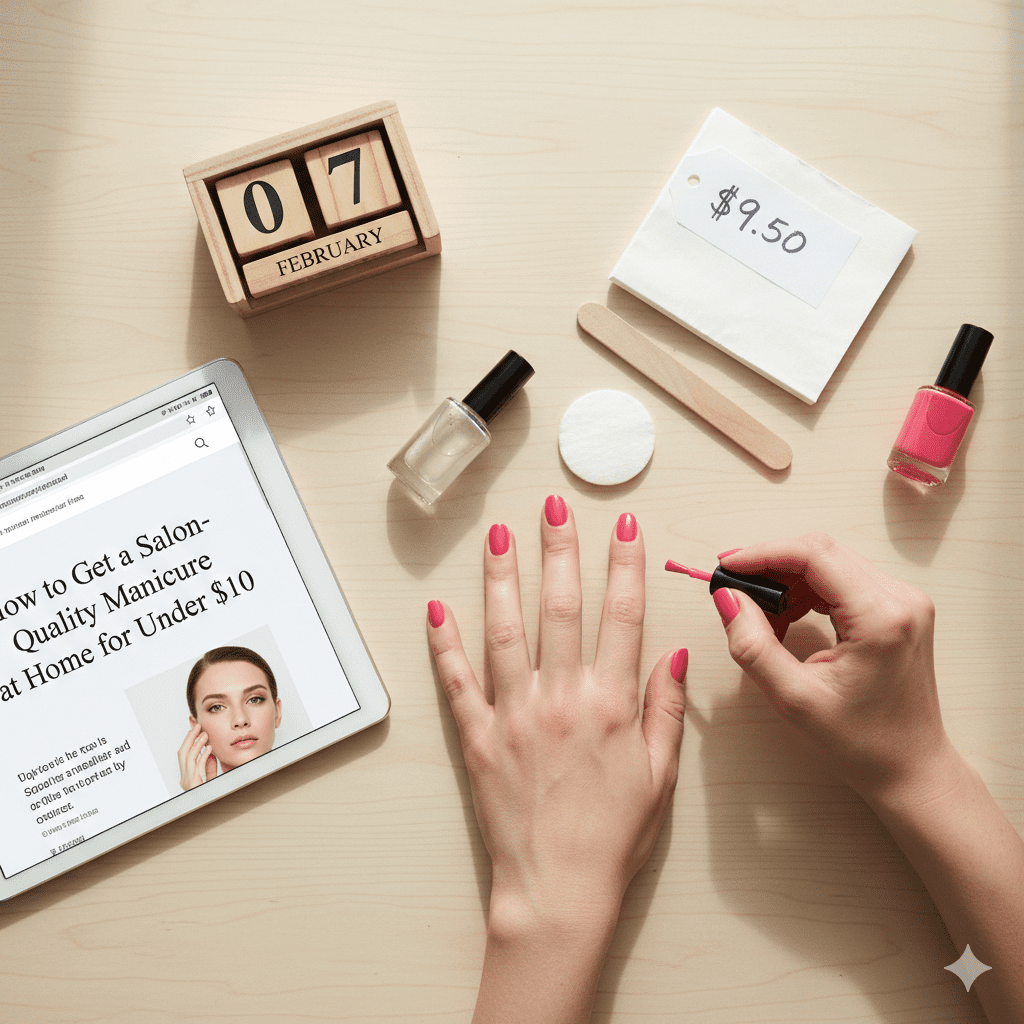
Let me walk you through exactly how to do it — step by step — for under $10.
What “Salon-Quality” Actually Means (From a Pro’s Perspective)
A salon manicure isn’t defined by price. It’s defined by these four things:
- Clean, even nail shaping
- Healthy cuticles (not overcut)
- Smooth polish application
- A finish that lasts more than 2 days
Once you understand this, doing a salon-quality manicure at home becomes much more achievable — and affordable.
The $10 Rule: Where Your Money Should (and Shouldn’t) Go
Spend Smart on These Essentials
You only need 5 basic items to get professional results:
- Nail file (180/240 grit) – $1
- Cuticle pusher (wood or metal) – $1
- Base coat – $2
- Any decent nail polish – $2–3
- Top coat – $2–3
That’s it. No electric files. No $15 cuticle oils.
Skip These Overhyped Products
I see beginners waste money on:
- Nail strengtheners they don’t need
- Fancy brush kits
- Cuticle cutters (dangerous at home)
Professional results come from control, not clutter.
Step-by-Step: How to Get a Salon-Quality Manicure at Home
Step 1: Shape Before You Touch Water
Always shape dry nails — this prevents splitting.
Pro Technique:
File in one direction only, not back and forth.
- Square = strongest
- Squoval = most flattering
- Round = best for short nails
This alone instantly improves how your manicure looks.
Step 2: Cuticle Prep Without Damage
This is where most at-home manicures go wrong.
What I do in the salon:
- Soak hands for 3–5 minutes in warm water
- Gently push cuticles back (never cut)
Cutting cuticles causes redness, peeling, and uneven polish lines — the opposite of salon-quality.
Step 3: Clean the Nail Plate (Non-Negotiable)
Before polish touches your nails:
- Wipe nails with alcohol or nail polish remover
- Remove all oils and residue
This step alone can double the life of your manicure.
Step 4: Apply Base Coat Like a Professional
Base coat is not optional.
Use one thin layer, not thick:
- Start 1mm away from the cuticle
- Push gently, then pull down
This creates a clean cuticle line — the signature of a salon-quality manicure at home.
Step 5: Polish Application (The 3-Stroke Rule)
This is the exact technique I teach new nail techs.
For each nail:
- One stroke down the center
- One stroke on the left
- One stroke on the right
Keep layers thin. Thick polish causes streaks, bubbles, and dents.
Step 6: Seal With a High-Gloss Top Coat
A glossy top coat instantly makes cheap polish look expensive.
Pro Tip:
Cap the free edge by lightly brushing polish across the tip — this prevents chipping.
Pro-Tips I Only Share With Clients
Pro Tip #1: Cold Water Trick
After nails dry for 5 minutes, dip fingertips in cold water for 30 seconds.
- Helps polish set faster
- Adds extra shine
Pro Tip #2: Fix Mistakes Without Ruining the Nail
Wrap a tiny bit of cotton around a toothpick, dip in remover, and clean edges precisely.
This is how pros get crisp lines without starting over.
Common Mistakes That Ruin At-Home Manicures
Avoid these and your results will instantly improve:
- Painting nails right after applying hand cream
- Using thick coats to “save time”
- Shaking polish bottles (roll them instead)
- Cutting cuticles aggressively
- Skipping base coat
Every one of these mistakes shortens wear time and ruins finish.
How to Make Your Manicure Last 5–7 Days
Longevity is part of a salon-quality manicure at home.
Do this:
- Wear gloves for cleaning
- Reapply top coat on day 3
- Avoid hot water for the first 2 hours
I’ve seen $2 polish last longer than $20 brands when applied correctly.
Nail Health on a Budget (What I Recommend)
Healthy nails = better manicures.
Instead of expensive treatments:
- Massage a drop of olive oil or coconut oil into cuticles nightly
- File, don’t clip, brittle nails
- Take breaks between polish changes
Your nails should look good without polish — that’s real professional care.
Pinterest-Friendly: Salon vs Budget Nail Secrets at a Glance
| Step | Professional Secret | Budget Hack |
| Prep | 99% alcohol wipe for oil-free nails | White vinegar (works in a pinch) |
| Shaping | One-way filing to prevent splits | Use a glass file (usually $2) |
| Drying | Cold water dip to set polish faster | Wait 5 minutes before touching anything |
Final Thought From a Nail Tech
A salon-quality manicure at home isn’t about copying salons — it’s about understanding why professionals do what they do.
With the right prep, thin layers, and smart product choices, you can get clean, glossy, long-lasting nails for under $10 — consistently.